A single expression can change the entire mood of a photograph. A slight smile can make a portrait feel warm and inviting, while a neutral gaze might convey professionalism and seriousness. But capturing the perfect expression is one of photography's greatest challenges. A subject might blink, look away, or offer a smile that doesn't quite reach their eyes.
For years, correcting these imperfections was the domain of skilled photo editors, requiring hours of meticulous work in complex software. Today, artificial intelligence is changing the game. This guide will walk you through both the traditional and modern AI-powered methods for changing facial expressions, giving you a complete understanding of the process.
The Traditional Method: Editing Expressions in Adobe Photoshop
Before AI editors became mainstream, altering a facial expression in Photoshop was a true test of an artist's skill. It's a powerful method that offers ultimate control, but it comes with a steep learning curve.
The typical workflow involves a combination of several tools:
- The Liquify Tool: This is the primary tool for pushing, pulling, and reshaping pixels. Editors carefully adjust key facial features: the corners of the mouth for a smile, the arch of an eyebrow, the openness of the eyes. This requires a deep understanding of facial anatomy to avoid an unnatural, "over-edited" look.
- Puppet Warp: For more significant changes to head position or posture, Puppet Warp allows you to place pins on an image and move them, warping the image more organically than Liquify.
- Clone Stamp & Healing Brush: When warping creates stretched or distorted textures, editors use these tools to paint over imperfections, borrowing texture from other parts of the image to maintain a natural skin look.
- Manual Compositing: In many cases, the easiest way to fix an expression is to take it from another photo. This involves carefully cutting out (masking) the eyes or mouth from a different shot, placing it onto the target image, and then meticulously blending the lighting, color, and skin tones to match.
This manual process is an art form, but it's also incredibly time-consuming and requires a high level of expertise to be convincing.
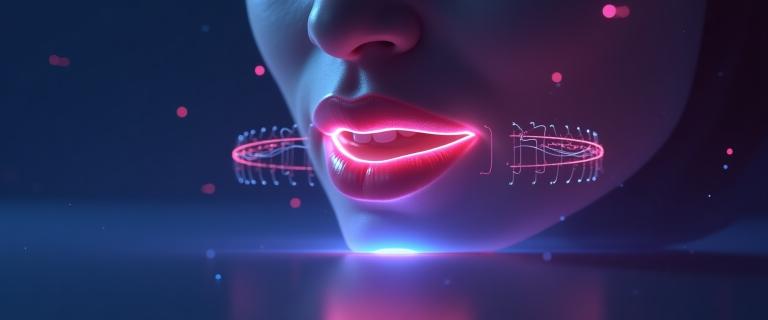
The AI Revolution: Introducing Expression Editor AI
Expression Editor AI was designed to solve the challenges of traditional editing. It uses a sophisticated AI model trained on millions of facial images to understand the nuances of human expression. Instead of manually pushing pixels, you use simple, intuitive sliders and controls to guide the AI.
The platform handles the complex anatomical adjustments, texture blending, and lighting changes automatically, allowing you to achieve professional-grade results in a fraction of the time.
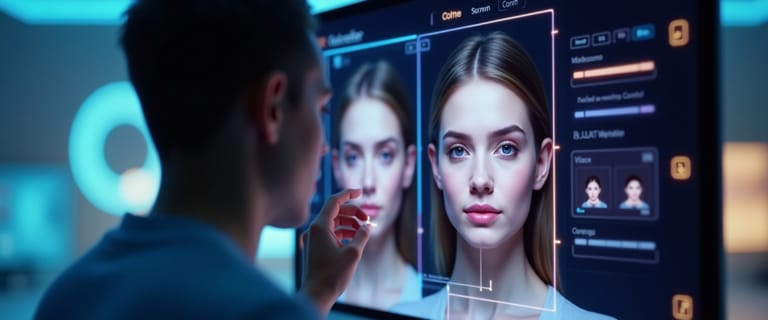
A Practical Guide: Changing Expressions with Expression Editor AI
Let's walk through the process of editing an expression using Expression Editor AI. For this guide, we recommend starting with a clear, front-facing photo with good lighting.
Step 1: Upload Your Photo and Set Up
- Navigate to the Create -> Face Edit.
- Upload your image. The AI will analyze the facial features to prepare for editing.
- Once uploaded, your image appears in the editor. Activate the 3D preview: this is a powerful feature that lets you see your adjustments in real-time before committing to a final generation.
Step 2: Adjust Head Position
The overall head position sets the foundation for the expression. Subtle adjustments here can make a huge difference.
- Pitch: Tilts the head up or down.
- Yaw: Turns the head left or right.
- Roll: Tilts the head side-to-side.
- Pro Tip: Use small, subtle adjustments. Even a 2-3 degree change can make a portrait feel more dynamic. See it in action in our gentle head turn demo.
Step 3: Perfect the Eyes
The eyes are the most expressive part of the face.
- Blink Control: Adjust the sliders to open or close the eyes slightly. This is perfect for fixing a mid-blink photo or adding a playful wink.
- Eye Direction: Guide the subject's gaze by adjusting the pupil position. Ensure the gaze is directed appropriately for the shot's context.
- Pro Tip: When adjusting a smile, remember that real smiles involve the eyes. Slightly narrowing the eyes (a "squinch") can make a smile appear more genuine.
Step 4: Refine the Smile and Mouth
- Smile Slider: This is your primary control for adding or enhancing a smile. The AI understands how a smile affects the rest of the face, including the cheeks and eyes.
- Mouth Shape: For more specific expressions, use the advanced controls ('AAA', 'EEE', 'WOO') to shape the mouth for speaking or singing poses.
- Pro Tip: Less is often more. A subtle, gentle smile is often more convincing than a wide grin. Compare your changes with the original using the preview toggle.
Step 5: Generate and Download
Once you're happy with the expression in the 3D preview, click 'Apply'. The AI will process the image and generate your new, edited photo. You can then download it in high resolution.
AI vs. Traditional Editing: A Comparison
| Feature | Expression Editor AI | Adobe Photoshop |
|---|---|---|
| Speed | Extremely Fast. Achieve results in minutes. | Slow. Can take hours of meticulous work for a single image. |
| Ease of Use | Very Easy. Intuitive sliders require no technical skill. | Difficult. Requires a steep learning curve and artistic talent. |
| Realism | High. AI is trained to produce natural, anatomically correct results. | Depends on Skill. Can be perfectly realistic or look fake if done poorly. |
| Control | Guided Control. You direct the AI, which handles the complex details. | Absolute Pixel-Level Control. You manually manipulate every aspect of the image. |
| Use Case | Ideal for photographers, marketers, and creators needing high-quality results fast. | Best for high-end retouchers and artists who need granular control for complex edits. |
Beyond Basic Adjustments: Advanced AI Features
For even more creative control, Expression Editor AI offers features that go beyond simple tweaks:
- Emotion Sync: Directly transfer an expression from one photo to another. This is the ultimate tool for ensuring consistency across a series of headshots.
- Magic Edit: Use text prompts to make targeted changes. For example, you could type "add a slight smirk" or "make the eyes look more surprised" to guide the AI with words.
- Erase and Replace: If a specific part of an expression is bothering you (like a distracting wrinkle or a stray hair), you can paint over it and let the AI regenerate the area seamlessly.
Conclusion: The Right Tool for the Job
Changing a facial expression is no longer a task reserved for elite photo editors. While traditional tools like Adobe Photoshop still offer unparalleled manual control for those who have the time and skill to master them, AI-powered platforms like Expression Editor AI have made it possible for anyone to achieve stunning, natural-looking results in minutes.
By understanding both methods, you can choose the right workflow for your project and unlock new creative possibilities for your photos.
Ready to transform your own photos? Start editing now and see the power of AI for yourself.